GitLab CI/CD Pipeline เป็นเครื่องมือที่ทรงพลังสำหรับการจัดการกระบวนการพัฒนา Deploy และทดสอบแอพพลิเคชันอัตโนมัติ บทความนี้จะอธิบายรายละเอียดวิธีการสร้าง Pipeline ตั้งแต่ Build จนถึง Deploy บน Cloud VPS ของ ผู้ให้บริการโฮสติ้ง โดยครอบคลุมจากพื้นฐานไปจนถึงการประยุกต์ใช้จริง
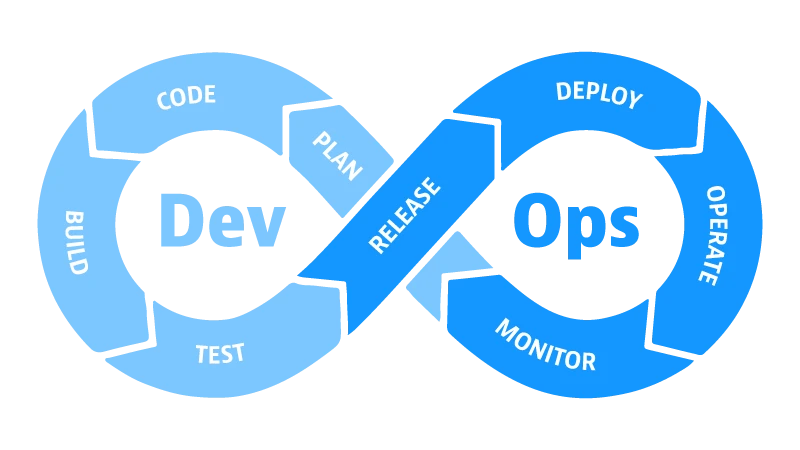
GitLab CI/CD คืออะไร
GitLab CI/CD (Continuous Integration/Continuous Deployment) เป็นบริการที่ช่วยให้นักพัฒนาสามารถทำการสร้าง ทดสอบ และ Deploy โปรแกรมได้อัตโนมัติ เมื่อมีการ Push Code ไปยัง Repository นักพัฒนาไม่ต้องรอจนกว่า QA จะทดสอบเอง หรือรอให้ DevOps Deploy ด้วยตนเอง
- Continuous Integration: ทดสอบ Code โดยอัตโนมัติเมื่อมี Commit ใหม่
- Continuous Deployment: Deploy ไปยังเซิร์ฟเวอร์ VPS ได้อัตโนมัติ
- Automation: ลดการทำงานด้วยมือและข้อผิดพลาด
- Visibility: เห็นสถานะของ Pipeline ได้อย่างชัดเจน
- Security: จัดการ Secret และ Protected Branches อย่างปลอดภัย
โครงสร้างไฟล์ .gitlab-ci.yml
ไฟล์ .gitlab-ci.yml เป็นไฟล์หลักที่สำคัญที่สุด เขียนในรูปแบบ YAML ไฟล์นี้จะบอก GitLab ว่าต้องทำอะไรเมื่อมี Push Code ใหม่:
image: docker:latest

stages:
  - build
  - test
  - deploy

variables:
  DOCKER_IMAGE: registry.gitlab.com/username/myapp:latest

build_docker_image:
  stage: build
  script:
    - docker build -t $DOCKER_IMAGE .
    - docker login -u $DOCKER_USERNAME -p $DOCKER_PASSWORD registry.gitlab.com
    - docker push $DOCKER_IMAGE
  only:
    - main

run_tests:
  stage: test
  image: $DOCKER_IMAGE
  script:
    - npm install
    - npm test
  only:
    - main

deploy_to_vps:
  stage: deploy
  script:
    - apt-get update -qq && apt-get install -y openssh-client
    - mkdir -p ~/.ssh
    - echo "$SSH_PRIVATE_KEY" > ~/.ssh/id_rsa
    - chmod 600 ~/.ssh/id_rsa
    - ssh-keyscan -H $VPS_HOST >> ~/.ssh/known_hosts
    - ssh $VPS_USER@$VPS_HOST "docker pull $DOCKER_IMAGE && docker-compose up -d"
  only:
    - main
  when: manual
Stages ของ CI/CD Pipeline
Pipeline ประกอบด้วยสามขั้นตอนหลักที่ทำงานเรียงลำดับตามที่กำหนด:
1. Build Stage
ในขั้นตอนนี้ GitLab จะทำการ Compile Code และสร้าง Docker Image หรือ Artifacts ที่จำเป็น:
build_job:
  stage: build
  script:
    - npm install
    - npm run build
    - docker build -t myapp:${CI_COMMIT_SHORT_SHA} .
  artifacts:
    paths:
      - dist/
    expire_in: 1 hour
2. Test Stage
ในขั้นตอนนี้ GitLab จะรันทดสอบ Unit Test, Integration Test และ Security Test:
test_job:
  stage: test
  script:
    - npm test
    - npm run test:coverage
  artifacts:
    reports:
      coverage_report:
        coverage_format: cobertura
        path: coverage/cobertura-coverage.xml
  coverage: '/Lines\s*:\s*(\d+\.\d+)%/'
3. Deploy Stage
ในขั้นตอนสุดท้าย GitLab จะ Deploy ไปยังเซิร์ฟเวอร์ VPS ของ ผู้ให้บริการโฮสติ้ง:
deploy_to_production:
  stage: deploy
  script:
    - apt-get install -y openssh-client
    - mkdir -p ~/.ssh
    - echo "$SSH_PRIVATE_KEY" | tr -d '\r' > ~/.ssh/id_rsa
    - chmod 600 ~/.ssh/id_rsa
    - ssh-keyscan -H $VPS_HOST >> ~/.ssh/known_hosts
    - ssh $VPS_USER@$VPS_HOST "cd /app && git pull && docker-compose up -d"
  environment:
    name: production
    url: https://myapp.com
  only:
    - main
  when: manual
ติดตั้ง GitLab Runner บน Cloud VPS
GitLab Runner เป็นแอพพลิเคชันที่รับ Job จาก GitLab Server แล้วดำเนินการตามที่กำหนด สามารถติดตั้งบน Cloud VPS ของ ผู้ให้บริการโฮสติ้ง เพื่อควบคุมสิ่งแวดล้อมได้เต็มที่:
# ติดตั้ง GitLab Runner Repository
curl -L https://packages.gitlab.com/install/repositories/runner/gitlab-runner/script.deb.sh | sudo bash

# ติดตั้ง GitLab Runner
sudo apt-get install -y gitlab-runner

# ติดตั้ง Docker
sudo apt-get install -y docker.io
sudo usermod -aG docker gitlab-runner

# ลงทะเบียน Runner กับ GitLab
sudo gitlab-runner register \
  --url https://gitlab.com \
  --registration-token $RUNNER_TOKEN \
  --executor docker \
  --docker-image ubuntu:latest \
  --description "VPS Runner"

# ตรวจสอบสถานะ
 sudo gitlab-runner status
ตัวอย่าง Pipeline ครบวงจร Build → Test → Deploy
ตัวอย่าง .gitlab-ci.yml ที่สมบูรณ์สำหรับ Node.js Application บน Cloud VPS:
image: node:18

variables:
  DOCKER_REGISTRY: registry.gitlab.com
  DOCKER_IMAGE: ${DOCKER_REGISTRY}/${CI_PROJECT_PATH}:${CI_COMMIT_SHA}
  DOCKER_IMAGE_LATEST: ${DOCKER_REGISTRY}/${CI_PROJECT_PATH}:latest

stages:
  - install
  - build
  - test
  - security
  - deploy

cache:
  paths:
    - node_modules/

install_dependencies:
  stage: install
  script:
    - npm ci
  artifacts:
    paths:
      - node_modules/
    expire_in: 1 hour

build_application:
  stage: build
  script:
    - npm run build
  artifacts:
    paths:
      - dist/
    expire_in: 1 hour
  only:
    - main

run_unit_tests:
  stage: test
  script:
    - npm test -- --coverage
  artifacts:
    reports:
      coverage_report:
        coverage_format: cobertura
        path: coverage/cobertura-coverage.xml
  only:
    - main

security_scan:
  stage: security
  script:
    - npm audit --audit-level=moderate
    - npm run lint
  allow_failure: true
  only:
    - main

deploy_to_vps:
  stage: deploy
  image: alpine:latest
  before_script:
    - apk add --no-cache openssh-client
  script:
    - mkdir -p ~/.ssh
    - echo "$SSH_PRIVATE_KEY" | tr -d '\r' > ~/.ssh/id_rsa
    - chmod 600 ~/.ssh/id_rsa
    - ssh-keyscan -H $VPS_HOST >> ~/.ssh/known_hosts
    - ssh $VPS_USER@$VPS_HOST "cd /var/www/myapp && git pull origin main && npm ci && npm run build && pm2 restart app"
  environment:
    name: production
    url: https://myapp.de.co.th
  only:
    - main
  when: manual
Docker Integration ใน GitLab CI/CD
Docker ช่วยให้ Environment ของการ Build, Test และ Deploy สอดคล้องกัน ลดปัญหา “Works on my machine”:
stages:
  - build
  - test
  - deploy

build_docker:
  stage: build
  image: docker:latest
  services:
    - docker:dind
  before_script:
    - docker login -u $CI_REGISTRY_USER -p $CI_REGISTRY_PASSWORD $CI_REGISTRY
  script:
    - docker build -t $CI_REGISTRY_IMAGE:$CI_COMMIT_SHORT_SHA .
    - docker push $CI_REGISTRY_IMAGE:$CI_COMMIT_SHORT_SHA
    - docker tag $CI_REGISTRY_IMAGE:$CI_COMMIT_SHORT_SHA $CI_REGISTRY_IMAGE:latest
    - docker push $CI_REGISTRY_IMAGE:latest

deploy_docker_to_vps:
  stage: deploy
  image: alpine:latest
  before_script:
    - apk add --no-cache openssh-client
  script:
    - mkdir -p ~/.ssh
    - echo "$SSH_PRIVATE_KEY" | tr -d '\r' > ~/.ssh/id_rsa
    - chmod 600 ~/.ssh/id_rsa
    - ssh-keyscan -H $VPS_HOST >> ~/.ssh/known_hosts
    - ssh $VPS_USER@$VPS_HOST "docker login -u $CI_REGISTRY_USER -p $CI_REGISTRY_PASSWORD $CI_REGISTRY && docker pull $CI_REGISTRY_IMAGE:latest && docker-compose up -d"
  only:
    - main
CI/CD Variables และ Secrets
การเก็บข้อมูลลับ เช่น SSH Key, Database Password หรือ API Key อย่างปลอดภัยเป็นสิ่งสำคัญ GitLab CI/CD มี Protected Variables ที่ช่วยให้คุณเก็บได้อย่างปลอดภัย:
- ไปที่ Settings → CI/CD → Variables
- คลิกปุ่ม “Add variable”
- เปิด “Protect variable” เพื่อใช้ได้บน Protected Branches เท่านั้น
- เปิด “Mask variable” เพื่อซ่อนค่าใน Log
เปรียบเทียบ GitLab CI/CD กับ GitHub Actions
ทั้ง GitLab CI/CD และ GitHub Actions เป็นเครื่องมือ CI/CD ที่ทรงพลัง แต่มีจุดแตกต่างสำคัญ:
| ลักษณะ | GitLab CI/CD | GitHub Actions |
|---|---|---|
| Runner | Self-hosted หรือ GitLab-hosted | GitHub-hosted หรือ Self-hosted |
| การตั้งค่า | .gitlab-ci.yml | .github/workflows/*.yml |
| ความปลอดภัย | สูง เพราะ Self-hosted | ปลอดภัย แต่น้อยกว่า Self-hosted |
| ราคา | ฟรีสำหรับ Self-hosted | ฟรี 2000 นาทีต่อเดือน |
| Ecosystem | Community projects | Marketplace actions |
Best Practices สำหรับ GitLab CI/CD
- ใช้ Protected Branches: กำหนดว่า Deploy ได้เฉพาะเมื่อ CI ผ่านเท่านั้น
- เก็บ Secrets อย่างปลอดภัย: ใช้ Protected Variables และ Masked Variables
- ใช้ Docker เพื่อ Consistency: ให้ Build, Test และ Deploy Environment เหมือนกัน
- Monitor Pipeline: ตรวจสอบว่า Build Time และ Deploy Time มีประสิทธิภาพ
- ทำ Code Review: ใช้ Merge Request และกำหนดให้มีการ Approve ก่อน Merge
สรุป
GitLab CI/CD Pipeline เป็นเครื่องมือที่จำเป็นสำหรับการพัฒนาสมัยใหม่ โดยการตั้งค่า Pipeline ที่ถูกต้องสามารถลดความผิดพลาด เพิ่มความเร็วในการ Deploy และเพิ่มประสิทธิภาพของทีมพัฒนา
หากคุณต้องการใช้บริการ Cloud VPS เพื่อติดตั้ง GitLab Runner และ Deploy แอพพลิเคชันของคุณ บริการ Cloud VPS ของ ผู้ให้บริการโฮสติ้ง เป็นตัวเลือกที่ดี มีความเสถียรสูง ราคาที่แข่งขันได้ และมีทีมสนับสนุนเพื่อช่วยเหลือคุณ
