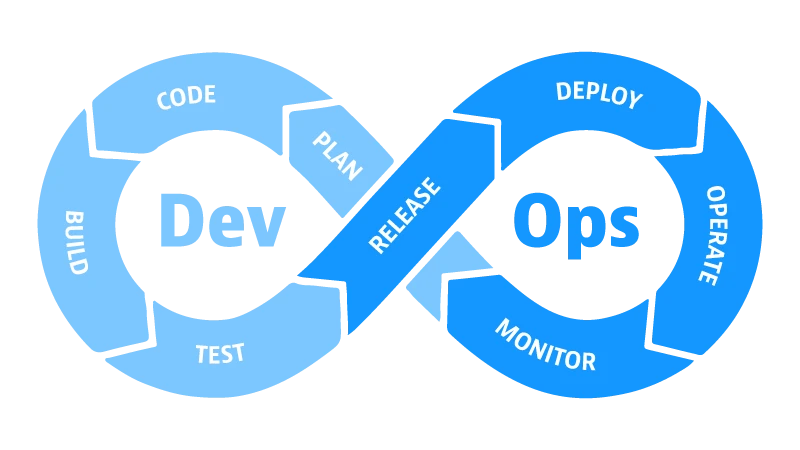
Full DevOps Stack คืออะไร
Full DevOps Stack คือการรวมกลุ่มของเครื่องมือและกระบวนการที่ครบวงจร เพื่อบริหารจัดการการพัฒนาซอฟต์แวร์ตั้งแต่การเขียนโค้ดไปจนถึงการ Deploy และการ Monitor ระบบบน Production Server ในบทความนี้เราจะตั้งค่า Full DevOps Stack บน Cloud VPS โดยใช้ Nginx เป็น Reverse Proxy, Docker สำหรับ Containerization, GitHub Actions สำหรับ CI/CD และ Prometheus + Grafana สำหรับ Monitoring
การมี DevOps Stack ที่สมบูรณ์ช่วยให้ทีมพัฒนาสามารถ Deploy แอปพลิเคชันได้รวดเร็ว ลดข้อผิดพลาด และมองเห็นสถานะของระบบได้ตลอดเวลา เหมาะกับโปรเจกต์ที่ต้องการความน่าเชื่อถือและ Scalability สูง
สิ่งที่ต้องเตรียมก่อนเริ่มต้น
ก่อนเริ่มตั้งค่า Full DevOps Stack ให้เตรียมสิ่งต่อไปนี้ให้พร้อม
- Cloud VPS ที่รัน Ubuntu 22.04 หรือ Debian 11 ขึ้นไป (แนะนำ VPS)
- ชื่อโดเมน (Domain Name) และสิทธิ์แก้ไข DNS
- บัญชี GitHub และ Repository สำหรับโปรเจกต์
- ความรู้พื้นฐานด้าน Linux Command Line
- RAM อย่างน้อย 2 GB สำหรับรัน Docker และ Monitoring Stack
ขั้นตอนที่ 1: ติดตั้ง Docker และ Docker Compose
เริ่มต้นด้วยการติดตั้ง Docker และ Docker Compose บน VPS เพื่อใช้เป็นพื้นฐานของการ Containerize แอปพลิเคชัน
# อัปเดต Package และติดตั้ง Docker
curl -fsSL https://get.docker.com -o get-docker.sh
sudo sh get-docker.sh

# เพิ่ม User ปัจจุบันเข้า Docker Group
sudo usermod -aG docker $USER
newgrp docker

# ติดตั้ง Docker Compose
sudo apt-get install docker-compose-plugin -y

# ตรวจสอบการติดตั้ง
docker --version
docker compose version
สร้างไฟล์ docker-compose.yml สำหรับแอปพลิเคชัน
version: '3.8'
services:
  app:
    build: .
    container_name: myapp
    restart: always
    ports:
      - "3000:3000"
    environment:
      - NODE_ENV=production
    networks:
      - webnet

networks:
  webnet:
    driver: bridge
ขั้นตอนที่ 2: ตั้งค่า Nginx เป็น Reverse Proxy
Nginx ทำหน้าที่เป็น Reverse Proxy รับ Request จาก Client และส่งต่อไปยัง Container ภายใน รวมถึงจัดการ SSL/TLS Certificate และ Load Balancing
# ติดตั้ง Nginx
sudo apt-get install nginx -y

# ติดตั้ง Certbot สำหรับ SSL
sudo apt-get install certbot python3-certbot-nginx -y
สร้างไฟล์ Config สำหรับโดเมนของคุณที่ /etc/nginx/sites-available/myapp
server {
    listen 80;
    server_name example.com www.example.com;

    location / {
        proxy_pass http://localhost:3000;
        proxy_http_version 1.1;
        proxy_set_header Upgrade $http_upgrade;
        proxy_set_header Connection 'upgrade';
        proxy_set_header Host $host;
        proxy_set_header X-Real-IP $remote_addr;
        proxy_set_header X-Forwarded-For $proxy_add_x_forwarded_for;
        proxy_cache_bypass $http_upgrade;
    }
}

# เปิดใช้งาน Config
sudo ln -s /etc/nginx/sites-available/myapp /etc/nginx/sites-enabled/
sudo nginx -t && sudo systemctl reload nginx

# ติดตั้ง SSL Certificate
sudo certbot --nginx -d example.com -d www.example.com
ขั้นตอนที่ 3: สร้าง CI/CD Pipeline ด้วย GitHub Actions
สร้างไฟล์ .github/workflows/deploy.yml ใน Repository เพื่อกำหนด Pipeline สำหรับ Build และ Deploy อัตโนมัติ
name: Deploy to Production

on:
  push:
    branches: [ main ]

jobs:
  deploy:
    runs-on: ubuntu-latest

    steps:
    - name: Checkout code
      uses: actions/checkout@v3

    - name: Build Docker image
      run: docker build -t myapp:latest .

    - name: Deploy via SSH
      uses: appleboy/ssh-action@master
      with:
        host: ${{ secrets.SERVER_HOST }}
        username: ${{ secrets.SERVER_USER }}
        key: ${{ secrets.SERVER_SSH_KEY }}
        script: |
          cd /opt/myapp
          git pull origin main
          docker compose pull
          docker compose up -d --build
          docker system prune -f
ตั้งค่า Secrets ใน GitHub Repository โดยไปที่ Settings → Secrets and variables → Actions แล้วเพิ่ม SERVER_HOST, SERVER_USER และ SERVER_SSH_KEY
ขั้นตอนที่ 4: ติดตั้ง Monitoring ด้วย Prometheus และ Grafana
Prometheus ทำหน้าที่เก็บ Metrics ของระบบ และ Grafana ใช้แสดงผลข้อมูลในรูปแบบ Dashboard ที่อ่านง่าย สร้างไฟล์ monitoring/docker-compose.yml
version: '3.8'
services:
  prometheus:
    image: prom/prometheus:latest
    container_name: prometheus
    restart: always
    volumes:
      - ./prometheus.yml:/etc/prometheus/prometheus.yml
      - prometheus_data:/prometheus
    ports:
      - "9090:9090"
    networks:
      - monitoring

  grafana:
    image: grafana/grafana:latest
    container_name: grafana
    restart: always
    volumes:
      - grafana_data:/var/lib/grafana
    ports:
      - "3001:3000"
    environment:
      - GF_SECURITY_ADMIN_PASSWORD=your_secure_password
    networks:
      - monitoring

  node-exporter:
    image: prom/node-exporter:latest
    container_name: node-exporter
    restart: always
    networks:
      - monitoring

volumes:
  prometheus_data:
  grafana_data:

networks:
  monitoring:
    driver: bridge
สร้างไฟล์ prometheus.yml สำหรับกำหนด Scrape Targets
global:
  scrape_interval: 15s

scrape_configs:
  - job_name: 'node-exporter'
    static_configs:
      - targets: ['node-exporter:9100']

  - job_name: 'myapp'
    static_configs:
      - targets: ['myapp:3000']
การทดสอบ Full DevOps Stack
หลังจากติดตั้งทุกส่วนแล้ว ให้ทดสอบการทำงานของแต่ละส่วน
- ทดสอบ Docker: รัน
docker psเพื่อตรวจสอบว่า Container ทั้งหมดกำลัง Running - ทดสอบ Nginx: เข้าเว็บไซต์ผ่านโดเมนและตรวจสอบว่า HTTPS ทำงานถูกต้อง
- ทดสอบ CI/CD: Push Code ไปยัง Branch main แล้วตรวจสอบ GitHub Actions ว่า Pipeline รันสำเร็จ
- ทดสอบ Monitoring: เข้า Grafana ที่
http://your-server:3001และตรวจสอบ Dashboard
Best Practices สำหรับ DevOps Stack
เพื่อให้ DevOps Stack ทำงานได้อย่างมีประสิทธิภาพและปลอดภัย ควรปฏิบัติตามหลักการต่อไปนี้
- ความปลอดภัย: ใช้ SSH Key แทน Password, ตั้งค่า Firewall ด้วย UFW, อัปเดต System Package เป็นประจำ
- Backup: ตั้งค่า Automated Backup สำหรับ Database และ Volume ของ Docker
- Monitoring: ตั้งค่า Alert ใน Grafana เมื่อ CPU หรือ Memory เกินกำหนด
- Logging: ใช้ ELK Stack หรือ Loki เพื่อรวบรวม Log จากทุก Service
- Resource Limit: กำหนด CPU และ Memory Limit ให้กับแต่ละ Container ใน Docker Compose
