Artifact Repository: Nexus และ Artifactory บน Cloud VPS
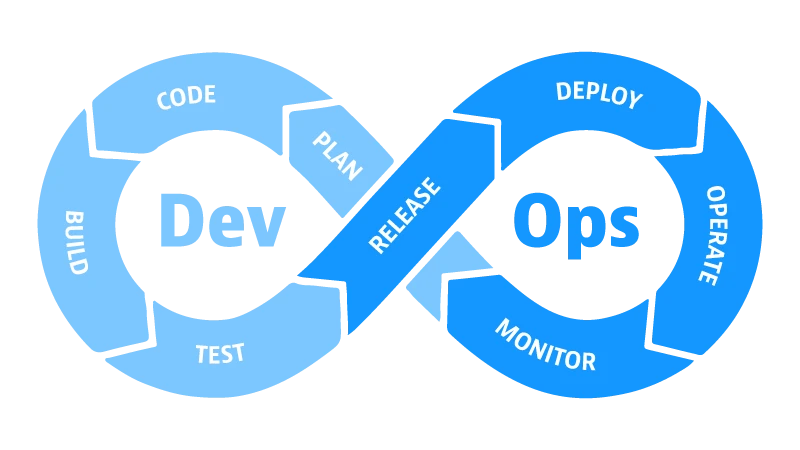
ในยุคของการพัฒนาซอฟต์แวร์สมัยใหม่ การจัดการ Artifact (สิ่งประดิษฐ์) เป็นส่วนสำคัญของ DevOps Pipeline ไม่ว่าจะเป็น Library, Application Package, หรือ Container Image Artifact Repository ช่วยให้ทีม Development สามารถจัดเก็บ จัดการ และดึง Artifact ได้อย่างมีประสิทธิภาพ ซึ่งเป็นหัวใจของการ Build และ Deployment สมัยใหม่
Artifact Repository คืออะไร ทำไมต้องมี
Artifact Repository คือพื้นที่เก็บรักษา (Repository) สำหรับเก็บผลิตภัณฑ์ของการพัฒนา เช่น JAR, WAR, DLL, NPM Package, Docker Image ฯลฯ ที่สร้างขึ้นจากการ Build ระบบนี้ทำหน้าที่เป็น Central Store ที่มีประสิทธิภาพ โปร่งใจ และปลอดภัย
เหตุผลที่ต้องใช้ Artifact Repository:
- ความเป็นส่วนกลาง (Centralization): ทีม Development ทั้งหมดสามารถเข้าถึง Artifact เวอร์ชันเดียวกันได้
- เวอร์ชัน Management: การติดตามและจัดการเวอร์ชันต่างๆ ของ Artifact ได้อย่างมีระเบียบ
- ความเร็วในการ Deploy: การดึง Artifact จากแหล่งเดียวช่วยเพิ่มความเร็วของ CI/CD Pipeline
- ความปลอดภัย (Security): ควบคุมการเข้าถึง จัดการสิทธิ์ และตรวจสอบความสมบูรณ์ของ Artifact
- ประหยัดแบนด์วิดท์: Cache ของ Artifact จากแหล่งภายนอกช่วยลดการใช้ Bandwidth
- Traceability: สามารถเห็นว่า Artifact ไหนถูกใช้ในโปรเจกต์ไหน และเมื่อไร
ประเภทของ Artifact ที่ Artifact Repository รองรับ
Artifact Repository สมัยใหม่รองรับหลากหลายประเภทของ Artifact ขึ้นอยู่กับภาษาการเขียนโปรแกรมและเทคโนโลยีที่ใช้:
- Maven (Java): JAR, WAR, POM files สำหรับโปรเจกต์ Java
- npm (JavaScript/Node.js): JavaScript Package และ Modules
- Docker: Container Images ที่พร้อมสำหรับการ Deploy
- PyPI (Python): Python Packages และ Wheels
- NuGet (.NET): Libraries และ Packages สำหรับ .NET Framework
- RubyGems (Ruby): Ruby Libraries และ Gems
- CocoaPods (Objective-C/Swift): iOS/macOS Dependencies
- Gradle (Java/Kotlin): Build Artifacts สำหรับ Gradle-based Projects
Nexus Repository Manager – คุณสมบัติและการติดตั้ง
Nexus Repository Manager จาก Sonatype เป็นหนึ่งในตัวเลือกยอดนิยมที่สุดสำหรับ Artifact Management โดยมีความสามารถที่หลากหลาย
คุณสมบัติสำคัญของ Nexus
- รองรับ Repository Types หลากหลาย (Hosted, Proxy, Group)
- มี Web UI ที่ใช้งานง่าย สำหรับการจัดการ Artifact
- Cleanup Policies สำหรับการลบ Artifact เก่า
- Security Scanning เพื่อหา Vulnerabilities
- Component Search ด้วย Advanced Filters
- Integration กับ CI/CD Tools (Jenkins, GitLab CI เป็นต้น)
- High Availability (HA) Configuration
- REST API สำหรับการ Automation
ขั้นตอนการติดตั้ง Nexus บน Cloud VPS
การติดตั้ง Nexus บน Cloud VPS ของ Dot Enterprise ทำได้ง่าย ๆ ดังนี้:
1. ข้อกำหนดระบบ (System Requirements):
- RAM อย่างน้อย 2GB (แนะนำ 4GB ขึ้นไป)
- CPU อย่างน้อย 2 Core
- Storage อย่างน้อย 20GB (ขึ้นอยู่กับขนาด Artifact)
- Java 8 ขึ้นไป
2. ติดตั้ง Java:
sudo apt update
sudo apt install -y openjdk-11-jdk-headless
java -version
3. ดาวน์โหลดและติดตั้ง Nexus:
cd /opt
sudo wget https://download.sonatype.com/nexus/3/latest-unix.tar.gz
sudo tar -xzf latest-unix.tar.gz
sudo mv nexus-* nexus
sudo useradd -r -s /bin/false nexus
sudo chown -R nexus:nexus /opt/nexus /opt/sonatype-work
4. สร้าง Systemd Service:
sudo nano /etc/systemd/system/nexus.serviceเพิ่มเนื้อหาดังนี้:
[Unit]
Description=Sonatype Nexus Repository Manager
After=network.target

[Service]
Type=forking
ExecStart=/opt/nexus/bin/nexus start
ExecStop=/opt/nexus/bin/nexus stop
User=nexus
Restart=on-abort

[Install]
WantedBy=multi-user.target
5. เปิดใช้งาน Service:
sudo systemctl daemon-reload
sudo systemctl enable nexus
sudo systemctl start nexus
6. เข้าถึง Nexus Web UI:
เมื่อ Service เริ่มทำงาน สามารถเข้าถึง Nexus ได้ที่ http://your-ip:8081 Username เริ่มต้นคือ admin และหาพาสเวิร์ดจาก
sudo cat /opt/sonatype-work/nexus3/admin.passwordJFrog Artifactory – คุณสมบัติและการติดตั้ง
JFrog Artifactory เป็น Enterprise Solution อีกตัวเลือกที่มีความสามารถระดับ Enterprise ด้วย Features ที่ครบครัน
คุณสมบัติสำคัญของ Artifactory
- รองรับ 30+ Package Types (Universal Repository Support)
- Federation และ Multi-Site Replication
- Advanced Security Features (Access Control, Encryption)
- Xray Integration สำหรับ Security Scanning
- Smart Artifacts Search และ Query
- Build Information สำหรับ Full Traceability
- REST API ที่ครบถ้วนสำหรับ Integration
- High Performance Caching
- Support สำหรับ Helm Charts, Terraform Modules
ขั้นตอนการติดตั้ง Artifactory บน Cloud VPS
1. ข้อกำหนดระบบ:
- RAM อย่างน้อย 4GB (แนะนำ 8GB ขึ้นไป)
- CPU อย่างน้อย 4 Cores
- Storage อย่างน้อย 50GB (สำหรับ Repository หลายตัว)
- Java 11 หรือ 17
- Database (PostgreSQL หรือ MySQL)
2. ติดตั้ง Database (PostgreSQL):
sudo apt install -y postgresql postgresql-contrib
sudo systemctl start postgresql
sudo systemctl enable postgresql

# สร้าง Database สำหรับ Artifactory
sudo -u postgres psql -c "CREATE USER artifactory WITH PASSWORD 'strong_password';"
sudo -u postgres psql -c "CREATE DATABASE artifactory OWNER artifactory;"
3. ดาวน์โหลดและติดตั้ง Artifactory:
cd /opt
sudo wget https://releases.jfrog.io/artifactory/bintray-artifactory/org/artifactory/pro/jfrog-artifactory-pro/latest/jfrog-artifactory-pro-latest.zip
sudo unzip jfrog-artifactory-pro-latest.zip
sudo useradd -r -s /bin/false artifactory
sudo chown -R artifactory:artifactory /opt/artifactory
4. กำหนด Database Connection:
sudo nano /opt/artifactory/etc/system.yamlเพิ่มการกำหนดค่า Database:
database:
  type: postgresql
  driver: org.postgresql.Driver
  url: jdbc:postgresql://localhost:5432/artifactory
  username: artifactory
  password: strong_password
5. เปิดใช้งาน Artifactory Service:
cd /opt/artifactory/bin
sudo ./artifactoryctl start
6. เข้าถึง Artifactory Web UI:
Artifactory สามารถเข้าถึงได้ที่ http://your-ip:8081/artifactory Default credentials: admin / password
เปรียบเทียบ Nexus vs Artifactory
| ตัวชี้วัด | Nexus Repository Manager | JFrog Artifactory |
| ราคา | Open Source (Free) + Pro | Enterprise (Paid) |
| ประเภท Repository รองรับ | ประมาณ 20+ types | 30+ types (มากกว่า) |
| ความเร็ว Performance | ดี | ดีมาก (Optimized) |
| Security Scanning | ต้องติดตั้ง Extension เพิ่มเติม | มี Xray Built-in |
| High Availability | Support ใน Pro Version | Support ใน Pro Edition |
| Ease of Setup | ค่อนข้างง่าย | ต้องการการกำหนดค่ามากขึ้น |
| Community Support | Community ที่ใหญ่ | ส่วนใหญ่ Enterprise Support |
| Cost of Ownership | ต่ำ (Free option) | สูง (Enterprise pricing) |
การเชื่อมต่อ Artifact Repository กับ CI/CD Pipeline
Artifact Repository สามารถรวมเข้ากับ CI/CD Pipeline เพื่อให้การ Build และ Deployment ทำงานได้อัตโนมัติ
ตัวอย่างการรวม Jenkins + Nexus
1. ติดตั้ง Jenkins Plugin สำหรับ Nexus:
ไปที่ Jenkins Dashboard → Manage Jenkins → Manage Plugins → Search “Nexus Artifact Uploader” → Install
2. กำหนดค่า Nexus Credentials ใน Jenkins:
Manage Jenkins → Manage Credentials → Global credentials → Add Credentials → Username with password
3. สร้าง Jenkinsfile สำหรับ Upload Artifact:
pipeline {
    agent any

    stages {
        stage('Build') {
            steps {
                sh 'mvn clean package'
            }
        }

        stage('Upload to Nexus') {
            steps {
                nexusArtifactUploader(
                    nexusVersion: 'nexus3',
                    protocol: 'http',
                    nexusUrl: 'your-ip:8081',
                    groupId: 'com.example',
                    version: '1.0.0',
                    repository: 'releases',
                    credentialsId: 'nexus-credentials',
                    artifacts: [
                        [artifactId: 'my-app',
                         classifier: '',
                         file: 'target/my-app.jar',
                         type: 'jar']
                    ]
                )
            }
        }
    }
}
ตัวอย่างการรวม GitLab CI + Artifactory
.gitlab-ci.yml Configuration:
stages:
  - build
  - upload

build:
  stage: build
  script:
    - npm install
    - npm run build

upload_to_artifactory:
  stage: upload
  script:
    - curl -u ${ARTIFACTORY_USER}:${ARTIFACTORY_PASSWORD}
      -T dist/my-app.tar.gz
      "${ARTIFACTORY_URL}/artifactory/releases/my-app-${CI_COMMIT_SHA}.tar.gz"
  only:
    - main
ตัวอย่างการใช้ Docker Image จาก Artifact Repository
docker login nexus.example.com:8082
docker push nexus.example.com:8082/my-app:latest
docker pull nexus.example.com:8082/my-app:latest
Best Practices สำหรับ Artifact Management
1. ประเมินความเหมาะสมของ Artifact Repository
- ใช้ Hosted Repository สำหรับ Artifacts ของทีมเอง
- ใช้ Proxy Repository เพื่อแคช External Dependencies (Maven Central, npm Registry ฯลฯ)
- ใช้ Group Repository เพื่อรวมหลาย Repositories ให้ Clients ใช้ Endpoint เดียว
2. Versioning Strategy
- ใช้ Semantic Versioning (MAJOR.MINOR.PATCH) เช่น 1.2.3
- แยกเวอร์ชัน Release จาก Snapshot ให้ชัดเจน
- จัดเก็บ Artifact เก่าเพื่อ Traceability แต่กำหนด Cleanup Policies
3. Security Best Practices
- ใช้ Strong Passwords และ Multi-Factor Authentication
- จำกัดการเข้าถึง Repositories โดยใช้ Role-Based Access Control (RBAC)
- ทำการ Scan Vulnerabilities โดยใช้ Security Tools (Xray, Trivy)
- เข้ารหัส Artifacts ใน Transit และ At Rest
- ตั้งค่า HTTPS สำหรับการเชื่อมต่อ Repository
4. Performance Optimization
- ใช้ Artifact Repository ที่ติดตั้งใน Cloud VPS เดียวกับ CI/CD Pipeline เพื่อลดแลตเวนซี
- ตั้งค่า Compression สำหรับ Artifacts ขนาดใหญ่
- เปิดใช้ CDN หรือ Caching Proxy เพื่อเพิ่มความเร็ว
- วางแผน Storage Capacity อย่างเหมาะสม
5. Artifact Naming Convention
สร้าง Naming Convention ที่สอดคล้องทั่วทั้งองค์กร เช่น:
{project-name}-{version}-{build-number}.{type}
example: my-app-1.2.3-build123.jar
example: frontend-app-2.0.0-stable.tar.gz
6. Backup และ Disaster Recovery
- ทำการ Backup Repository อย่างสม่ำเสมอ
- ทดสอบ Restore Process เพื่อให้มั่นใจว่า Backup สามารถใช้งานได้
- เก็บ Backup ในสถานที่แยกจาก Production Server
สรุป
Artifact Repository เป็นองค์ประกอบสำคัญของ Modern DevOps Infrastructure ที่ช่วยให้ Organizations สามารถจัดการ Artifacts ได้อย่างมีประสิทธิภาพ ปลอดภัย และมีการควบคุมที่ดี
เลือก Nexus หากคุณ:
- ต้องการ Solution ที่ Open Source และประหยัดต้นทุน
- มี Team ที่มีประสบการณ์จัดการ Infrastructure
- มีความยืดหยุ่นในการปรับแต่ง
เลือก Artifactory หากคุณ:
- ต้องการ Enterprise Solution ที่มี Features ครบครัน
- ต้องการ Built-in Security Scanning (Xray)
- ต้องการ Premium Support และ SLA Guarantees
ทั้ง Nexus และ Artifactory สามารถติดตั้งได้ง่าย ๆ บน Cloud VPS ของ Dot Enterprise ด้วยความสามารถในการสเกล ความปลอดภัย และเครือข่ายที่เสถียร Cloud VPS จาก Dot Enterprise เป็นพื้นฐาน Infrastructure ที่ดีสำหรับการติดตั้ง Artifact Repository ระดับ Production ด้วยตัวเลือก Specification ที่หลากหลาย ตั้งแต่ 2 GB RAM ไปจนถึง 96 GB RAM คุณสามารถเลือกแพคเกจที่เหมาะสมตามความต้องการของทีมของคุณได้
สำหรับข้อมูลเพิ่มเติมเกี่ยวกับการติดตั้งและการตั้งค่า Artifact Repository บน Cloud VPS โปรดติดต่อทีม Support ของ Dot Enterprise ได้ที่ https://de.co.th หรือติดตามบทความ Knowledge Base ของเราเพื่อได้รับข้อมูลเพิ่มเติมเกี่ยวกับ DevOps Tools และ Best Practices ต่าง ๆ
คำถามที่พบบ่อย (FAQ)
Q: Artifact Repository ต่างจาก Container Registry อย่างไร?
A: Artifact Repository จัดเก็บ Artifacts ประเภทต่าง ๆ (JAR, NPM, Docker Images ฯลฯ) ในขณะที่ Container Registry เฉพาะเจาะจงสำหรับเก็บ Docker Images เท่านั้น ทั้ง Nexus และ Artifactory รองรับ Container Registry ด้วย
Q: ต้องใช้ Artifact Repository หลายตัวหรือไม่?
A: สำหรับ Organizations ขนาดเล็ก Repository เดียวก็เพียงพอ แต่สำหรับ Organizations ขนาดใหญ่ อาจต้องใช้หลายตัวแยกแยะตามประเภท (Java, JavaScript, Docker ฯลฯ) หรือตามทีม
Q: ข้อมูล Artifact ต้องการ Backup แค่ไหน?
A: Artifacts เป็นข้อมูลสำคัญ ต้องมี Backup อย่างน้อยรายวัน โดยเฉพาะ Release Artifacts ที่สำคัญต่อ Production
Q: Nexus Open Source เหมาะสมสำหรับ Production หรือไม่?
A: ได้ เป็นไปได้ที่จะใช้ Nexus Open Source ใน Production แต่ต้องจัดการ HA และ Backup เอง ส่วน Pro Version มี Support และ Features มากกว่า
