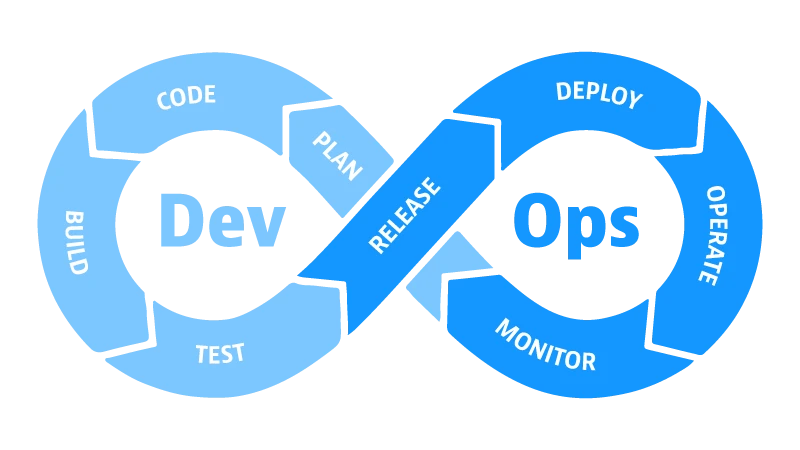
Jenkins Pipeline as Code เป็นแนวทางการเขียน Build Pipeline ในรูปแบบ Code ที่เก็บไว้ใน Version Control System ร่วมกับซอร์สโค้ดโปรเจกต์ของคุณ Jenkinsfile คือไฟล์ที่เขียน Pipeline Definition ซึ่งช่วยให้ Continuous Integration และ Continuous Deployment มีประสิทธิภาพและสามารถบำรุงรักษาได้ดีขึ้น
Jenkinsfile คืออะไร และข้อดีของ Pipeline as Code
Jenkinsfile เป็นไฟล์ที่อยู่ในไดเรกทอรี่ root ของโปรเจกต์ เขียนด้วยภาษา Groovy ซึ่งทำงานบน Java Virtual Machine ข้อดีสำคัญของ Pipeline as Code:
- Version Control: Pipeline Definition เก็บใน Git Repository ร่วมกับซอร์สโค้ด สามารถ Track History ได้
- Reusability: สามารถนำ Pipeline ไปใช้ซ้ำได้ในหลายโปรเจกต์
- Code Review: Pull Request จะรวม Pipeline Changes ด้วย
- Disaster Recovery: สามารถ Restore Pipeline ได้จาก Git History
Declarative Pipeline vs Scripted Pipeline
Declarative Pipeline
Declarative Pipeline มี Structure ที่ชัดเจน ใช้ง่าย ปลอดภัยกว่า แนะนำสำหรับ Pipeline ส่วนใหญ่
pipeline {
  agent any
  stages {
    stage('Build') {
      steps {
        sh 'npm install'
      }
    }
  }
}
Scripted Pipeline
Scripted Pipeline ให้ความยืดหยุ่นมากขึ้น ใช้ Groovy Script ทั้งหมด เหมาะสำหรับ Pipeline ที่ซับซ้อน
node {
  stage('Build') {
    sh 'npm install'
  }
}
ส่วนใหญ่แนะนำให้ใช้ Declarative Pipeline เพราะให้ความเสถียรและสะดวกกว่า
โครงสร้างพื้นฐาน: Pipeline, Agent, Stages, Steps
Agent
ระบุว่า Pipeline จะรันบน Agent ใด
agent any         // รันบน Agent ใดก็ได้
agent { label 'linux' }   // เฟ้น Agent ตาม Label
agent { docker { image 'node:18' } }  // รันใน Docker
Stages และ Steps
stages {
  stage('Build') {
    steps {
      sh 'npm install'
      sh 'npm run build'
    }
  }
  stage('Test') {
    steps {
      sh 'npm test'
    }
  }
  stage('Deploy') {
    steps {
      sh './deploy.sh'
    }
  }
}
Environment Variables และ Credentials
pipeline {
  agent any
  environment {
    APP_NAME = 'my-app'
    BUILD_ENV = 'production'
    SERVER_IP = '203.150.xxx.xxx'
    SSH_KEY = credentials('vps-ssh-key')  // ได้จาก Jenkins Credentials
  }
  stages {
    stage('Build') {
      steps {
        echo "Building ${APP_NAME} for ${BUILD_ENV}"
        sh 'npm install'
      }
    }
    stage('Deploy') {
      steps {
        sh 'ssh -i ${SSH_KEY} user@${SERVER_IP} "cd /app && pm2 restart app"'
      }
    }
  }
}
When Conditions: Branch และ Environment Triggers
stages {
  stage('Deploy to Production') {
    when { branch 'main' }
    steps { sh './deploy-prod.sh' }
  }
  stage('Deploy to Staging') {
    when { branch 'develop' }
    steps { sh './deploy-staging.sh' }
  }
  stage('Run only on tag') {
    when { tag 'v*' }
    steps { sh './release.sh' }
  }
}
Parallel Stages: การรันงานพร้อมกัน
Parallel Stages ช่วยลดเวลา Build ด้วยการรันหลาย Stage พร้อมกัน
stages {
  stage('Test and Build') {
    parallel {
      stage('Unit Tests') {
        steps { sh 'npm test' }
      }
      stage('Lint') {
        steps { sh 'npm run lint' }
      }
      stage('Build') {
        steps { sh 'npm run build' }
      }
    }
  }
}
Post Actions: always, success, failure
post {
  always {
    echo 'Pipeline execution completed'
    cleanWs()  // ลบ Workspace
  }
  success {
    echo 'Build successful!'
    // แจ้ง Slack
  }
  failure {
    echo 'Build failed!'
    mail to: '[email protected]',
         subject: "Build ${BUILD_NUMBER} Failed",
         body: "Check Jenkins: ${BUILD_URL}"
  }
  unstable {
    echo 'Build is unstable'
  }
}
ตัวอย่าง Jenkinsfile สมบูรณ์สำหรับ Node.js Deploy ไปยัง Cloud VPS ด้วย SSH
ตัวอย่าง Jenkinsfile ที่สมบูรณ์สำหรับ Node.js Application Deploy ไปยัง Cloud VPS ผ่าน SSH:
pipeline {
  agent any

  environment {
    APP_NAME = 'nodejs-app'
    NODE_ENV = 'production'
    SERVER_IP = '203.150.xxx.xxx'
    SERVER_USER = 'deploy'
    APP_PATH = '/var/www/nodejs-app'
  }

  options {
    buildDiscarder(logRotator(numToKeepStr: '10'))
    timeout(time: 30, unit: 'MINUTES')
    timestamps()
  }

  stages {
    stage('Checkout') {
      steps {
        checkout scm
      }
    }

    stage('Install Dependencies') {
      steps {
        sh 'npm install'
      }
    }

    stage('Test and Lint') {
      parallel {
        stage('Unit Tests') {
          steps { sh 'npm test' }
        }
        stage('Linting') {
          steps { sh 'npm run lint' }
        }
      }
    }

    stage('Build') {
      steps {
        sh 'npm run build'
      }
    }

    stage('Deploy to Cloud VPS') {
      when { branch 'main' }
      steps {
        withCredentials([sshUserPrivateKey(credentialsId: 'vps-ssh-key', keyFileVariable: 'SSH_KEY')]) {
          sh '''
            ssh -i ${SSH_KEY} -o StrictHostKeyChecking=no ${SERVER_USER}@${SERVER_IP} "
              cd ${APP_PATH} && \
              git pull origin main && \
              npm install --production && \
              npm run build && \
              pm2 restart ${APP_NAME} || pm2 start npm --name '${APP_NAME}' -- start
            "
          '''
        }
      }
    }

    stage('Health Check') {
      when { branch 'main' }
      steps {
        retry(3) {
          sh 'curl -f http://${SERVER_IP}:3000/health || exit 1'
        }
      }
    }
  }

  post {
    always { cleanWs() }
    success {
      echo 'Deployment successful!'
    }
    failure {
      mail to: '[email protected]',
           subject: "Build ${BUILD_NUMBER} Failed",
           body: "Check the build logs at ${BUILD_URL}"
    }
  }
}
Shared Libraries
Shared Libraries ช่วยให้สามารถเขียน Code ที่ใช้ร่วมในหลาย Pipeline โครงสร้าง:
shared-library/
├── src/
├── vars/
│   ├── deployVPS.groovy
│   └── runTests.groovy
└── resources/
ตัวอย่างไฟล์ vars/deployVPS.groovy:
def call(String server, String appPath) {
  withCredentials([sshUserPrivateKey(credentialsId: 'vps-ssh-key', keyFileVariable: 'SSH_KEY')]) {
    sh """
      ssh -i ${SSH_KEY} deploy@${server} "
        cd ${appPath} && git pull && npm install --production && pm2 restart app
      "
    """
  }
}
ใช้ Shared Library ใน Jenkinsfile:
@Library('shared-library') _

pipeline {
  agent any
  stages {
    stage('Deploy') {
      steps {
        deployVPS('203.150.xxx.xxx', '/var/www/app')
      }
    }
  }
}
สรุป
Jenkins Pipeline as Code ด้วย Jenkinsfile ช่วยให้ทีมพัฒนามี CI/CD Pipeline ที่สามารถสอบทาน ตรวจสอบ และ Deploy ได้อย่างมีประสิทธิภาพ
สำหรับการ Deploy Application ไปยัง Server บนระบบ Cloud ที่มีประสิทธิภาพและเสถียร Cloud VPS ของ ผู้ให้บริการโฮสติ้ง คือตัวเลือกที่ยอดเยี่ยม พร้อมทีม Support ภาษาไทยดูแลตลอด 24 ชั่วโมง
